
The Enduring Value of Clean Code in Swift Development
In the fast-paced world of iOS and macOS development, the pressure to ship features can often overshadow the discipline required to write clean, maintainable code. Yet, as we look towards 2025, the principles of software craftsmanship are more relevant than ever. Clean code is not an academic exercise; it is a fundamental business imperative. It is the invisible architecture that determines whether an application can evolve gracefully or will crumble under the weight of its own complexity. Code is read far more often than it is written, and a codebase that is difficult to comprehend is a direct tax on future development. Every confusing variable name, every monolithic function, and every tightly coupled module adds friction, slowing down bug fixes and new feature implementation. This isn’t just a minor inconvenience; it has a significant financial impact. A 2022 report by Stripe, “The Developer Coefficient,” revealed that developers spend, on average, over 17 hours per week on maintenance tasks, a substantial portion of which is dedicated to navigating technical debt and what they term “bad code.” This is nearly half of a developer’s working week spent not on innovation, but on untangling the knots of past decisions. For a Swift developer, this means less time creating delightful user experiences and more time deciphering convoluted logic. As Swift continues to mature, with powerful features like structured concurrency and advanced generics, the potential for both elegant solutions and complex messes grows. Adhering to best practices ensures we harness the language’s power for good, building applications that are not only functional today but also resilient, scalable, and a pleasure to work on for years to come. A commitment to clean code is an investment in velocity, stability, and team morale.
Foundational Principles: Naming and Readability
The Art of Expressive Naming
The bedrock of readable code is clear, unambiguous naming. Swift itself champions this philosophy through its comprehensive API Design Guidelines, which famously state that clarity is more important than brevity. This principle should permeate every line of code you write. A variable named x or data offers no context, forcing the next developer (which might be you in six months) to hunt through the code to understand its purpose. In contrast, a name like userProfileImageData or pendingFriendRequests is self-documenting. The intent is immediately clear, reducing cognitive load and the potential for misunderstandings. When naming functions, strive for language that reads like a sentence, especially when used at the call site. For example, a function signature like func move(to: CGPoint) allows for a call that reads naturally: sprite.move(to: newPosition). This follows the principle of naming based on side effects. If a function returns a new value without changing the instance, it should be named as a noun (e.g., view.resized(to: newSize)). If it mutates the instance in place, it should be a verb (e.g., view.resize(to: newSize)). This consistency is vital. Class, struct, and enum names should be nouns that describe what the type represents, following PascalCase (e.g., UserProfile, NetworkConfiguration). Variables, constants, and function names should follow lowerCamelCase (e.g., firstName, loadConfiguration()). Investing a few extra seconds to find the perfect name pays dividends every time someone reads your code. This isn’t about being verbose for its own sake; it’s about precision and communication.

Structuring Code for Clarity
Beyond naming, the physical layout of your code within a file significantly impacts its readability. A large, monolithic file is intimidating and difficult to navigate. Swift provides a simple yet powerful mechanism for organizing code: the MARK, TODO, and FIXME comments. Using // MARK: - Section Name creates a distinct, navigable section in Xcode’s function menu, allowing you to group related properties, methods, protocol conformances, and initializers. This acts as a table of contents for your type. For instance, you can separate public API from private implementation details or group all UITableViewDataSource methods together. Vertical spacing is another critical tool. Use blank lines to separate logical chunks of code within a method, much like paragraphs in an essay. This visual separation helps the reader’s brain parse the code’s flow and identify distinct steps in an algorithm. Conversely, code that performs a single, cohesive task should be kept together. The goal is to create a visual rhythm that guides the reader through the logic. Finally, while modern displays are wide, excessively long lines of code are a classic readability killer. Forcing a reader to scroll horizontally breaks their concentration. Aim to keep lines under 100-120 characters. This often has the positive side effect of encouraging you to break down complex statements into smaller, more understandable parts, assigning intermediate results to well-named variables. A well-structured file is a map that guides the reader, making the journey through your logic effortless.
Leveraging Swift’s Powerful Type System
Embrace struct over class by Default
One of the most significant shifts in Swift programming philosophy compared to its Objective-C predecessor is the emphasis on value types. Your default choice for modeling data should always be a struct, resorting to a class only when you specifically need the behaviors it provides. This “value semantics” approach has profound benefits for code clarity and safety. Structs are value types, meaning when you pass them around your application, a copy is made. This completely eliminates a whole category of bugs related to shared mutable state. You never have to worry that a function you passed a User struct to will unexpectedly change the user’s name in another part of your app. This makes your data flow predictable and easier to reason about, which is especially critical in concurrent environments where multiple threads could otherwise race to modify the same object. This copy-on-write behavior is also highly performant for most use cases, as structs are typically allocated on the stack, which is much faster than the heap allocation required for classes. So, when do you need a class? The primary reason is when you need to model identity. If you have an object that represents a specific, unique entity that needs to be shared and mutated from multiple places—like a local database connection or a shared view controller—a class is the appropriate tool. You also need classes for Objective-C interoperability or when you need to use features exclusive to classes, such as deinitializers. For a deeper understanding of Swift’s foundational types, reviewing an Introduction to Swift can be incredibly beneficial. By defaulting to structs, you create a safer, more predictable, and often more performant codebase.
The Power of enum for State and Data Modeling
Enums in Swift are far more powerful than their counterparts in many other languages. They are a first-class tool for modeling state and data with compile-time safety. Gone are the days of using booleans or optional strings to represent a finite set of states, a practice fraught with peril. An isLoading boolean and an optional error variable can easily lead to invalid states, such as being in an error state while also loading. Swift’s enums with associated values solve this elegantly. You can define a state machine that can only ever exist in one valid state at a time. For example, modeling the state of a network request becomes incredibly robust: enum ViewState. With this definition, it is impossible for your view to be in both a loaded and an error state simultaneously. The compiler enforces this correctness. This pattern is invaluable for representing any situation with a discrete set of possible outcomes. It forces you to handle every case exhaustively in switch statements, preventing you from forgetting to handle a particular state. This compile-time checking eliminates a whole class of runtime bugs. Using enums to model your data turns the compiler into your trusted partner, ensuring that your logic correctly accounts for every possible scenario before your app even runs.
| Traditional Approach (Prone to Invalid States) | Enum-based Approach (Compile-Time Safe) |
|---|---|
var isLoading: Bool = false |
enum LoadState { |
var items: [Item]? |
case idle |
var error: Error? |
case loading |
// Risk: isLoading can be true while error is not nil |
case loaded([Item]) |
// Risk: items and error can both be non-nil |
case failed(Error) |
// Logic requires multiple if-let checks |
} |
var state: LoadState = .idle |
Modern Swift Patterns for Robustness and Scalability
Mastering Error Handling with Result and async/await
Swift’s error handling has evolved significantly, offering powerful and elegant ways to manage failures. While the traditional do-try-catch mechanism is still effective, the Result type, introduced in Swift 5, provides a more explicit and functional approach. Result is an enum that explicitly represents either a successful outcome with a value or a failure with an error. This is incredibly useful in asynchronous operations, where you want to pass the outcome of a task through a completion handler. Instead of a handler with two optional parameters like (Data?, Error?), which can lead to ambiguous states, a single Result parameter makes the outcome crystal clear. It can be either success or failure, never both or neither. This clarity extends to the call site, where a switch statement can exhaustively handle both outcomes. This pattern dovetails perfectly with Swift’s modern concurrency system, built around async/await. This syntax transforms asynchronous code, making it look and behave like synchronous code, eliminating the “pyramid of doom” of nested completion handlers. Functions can be marked with async throws, allowing them to be called with try await. This seamlessly integrates the throwing mechanism with structured concurrency, allowing errors to propagate up the call stack naturally. You can wrap these calls in a do-catch block or assign their outcome to a Result type, giving you the flexibility to choose the best error-handling strategy for the situation. For a deeper exploration of these powerful features, this guide to Swift Concurrency is an excellent resource.
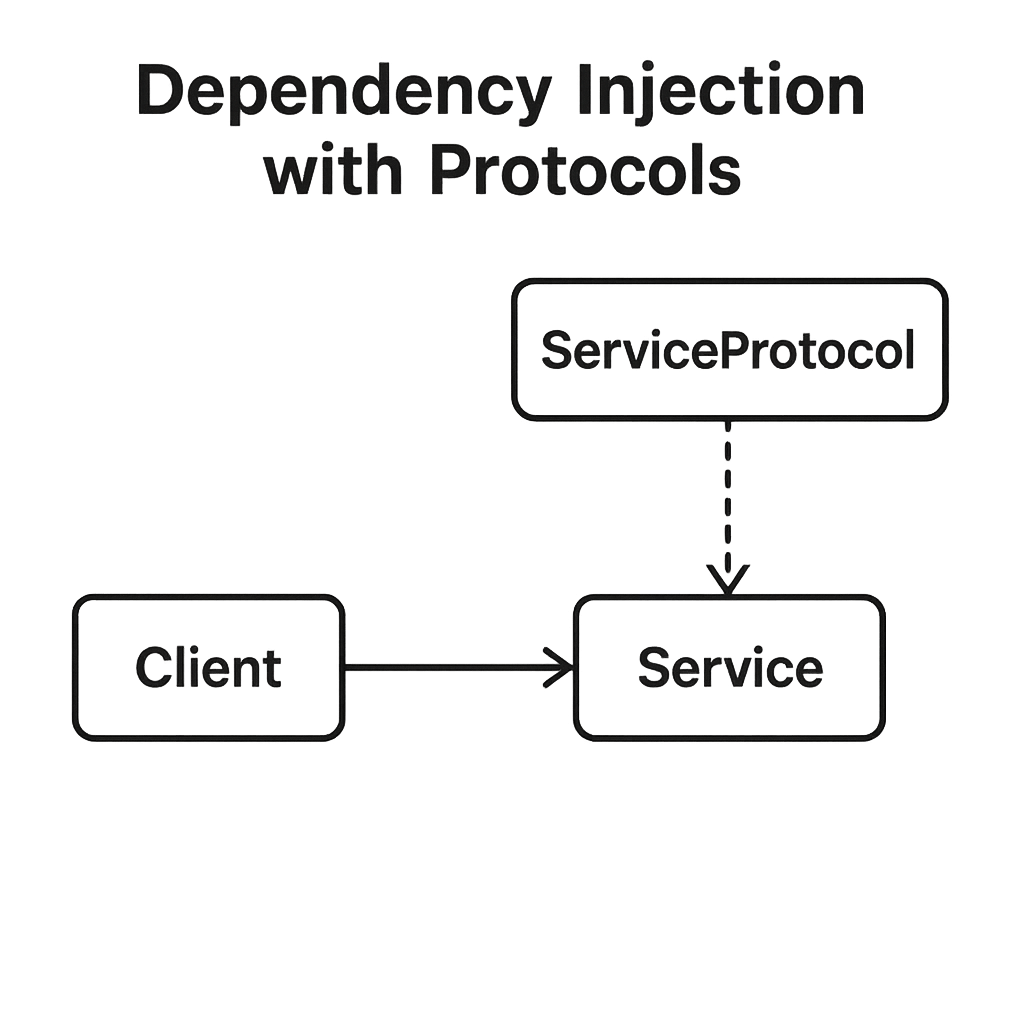
Dependency Injection and Protocol-Oriented Programming (POP)
As applications grow, managing dependencies becomes a primary challenge. Dependency Injection (DI) is a design pattern that addresses this by decoupling components. Instead of a view controller creating its own networking service directly (a hard-coded dependency), the dependency is “injected” from the outside, typically during initialization. This simple change has a massive impact. It makes your code more modular, flexible, and, most importantly, testable. To make this work effectively in Swift, we lean heavily on Protocol-Oriented Programming (POP). Instead of depending on a concrete type like APINetworkService, our view controller should depend on a protocol, say, NetworkFetching. The APINetworkService class would then conform to this protocol. This abstraction is key. In your application, you inject the real APINetworkService. But in your tests, you can create a MockNetworkFetcher that also conforms to NetworkFetching and returns canned data or specific errors. This allows you to test your view controller’s logic in complete isolation, without making actual network calls. This combination of POP and DI is a cornerstone of modern Swift architecture. It avoids the rigidity of classical inheritance hierarchies and promotes composition over inheritance, a core tenet of Swift’s design. By defining dependencies as protocols, you create clean boundaries between your modules, making the entire system easier to understand, maintain, and test. For those looking to master these concepts, delving into Advanced Swift topics is a logical next step.
Architecting for the Future: SwiftUI and Beyond
Writing Clean and Composable SwiftUI Views
SwiftUI represents a paradigm shift in UI development for Apple’s platforms. Its declarative nature encourages a different way of thinking about structure and state. To write clean SwiftUI code, the Single Responsibility Principle is paramount. A SwiftUI view should do one thing and do it well. Avoid creating massive, monolithic body properties. Instead, break down complex UIs into smaller, reusable child views. This not only makes your code easier to read but also improves performance, as SwiftUI can be more intelligent about which parts of the view hierarchy need to be re-rendered when state changes. Understanding state management is also critical. Use the right property wrapper for the job. @State is for simple, transient view-specific state that is owned by the view. @Binding creates a two-way connection to a state owned by a parent view. @StateObject is used to create and own a reference-type view model for the lifetime of a view, while @ObservedObject is used to subscribe to an existing view model instance that is passed into the view. Misusing these can lead to subtle bugs and performance issues. A clean SwiftUI view is small, focused, and clearly defines its dependencies on the state it needs to render. If you are just starting your journey with this framework, Getting Started with SwiftUI provides the essential foundation.
Adopting a Clear Architectural Pattern
While SwiftUI handles the “V” in traditional patterns, a robust application still needs a clear architecture to manage business logic, data flow, and state. There is no single “best” architecture; the right choice depends on the scale and complexity of your project. Consistency is more important than the specific pattern you choose. The Model-View-ViewModel (MVVM) pattern is a popular and natural fit for SwiftUI, where the ViewModel (an ObservableObject) exposes state to the View and contains the business logic to transform Model data. For more complex applications with intricate state management and side effects, The Composable Architecture (TCA) offers a more prescriptive, functional approach that can lead to highly testable and predictable code. Other patterns like VIPER (View-Interactor-Presenter-Entity-Router) offer even stricter separation of concerns, which can be beneficial for very large teams and projects. You can find a great overview of common approaches in this article on iOS App Architecture. The goal of any architecture is to create a clear separation of concerns. Your UI code should not be making network calls, and your networking layer should not know about UIColor. By establishing these boundaries, you create a system where components can be developed, tested, and replaced independently, allowing the application to scale without collapsing under its own weight.
| Pattern | Key Characteristic | Best For |
|---|---|---|
| MVVM | Binds Views to ViewModels, which expose state and actions. | Small to large projects, natural fit for SwiftUI and Combine. |
| TCA | Unidirectional data flow, manages state, actions, and side effects. | Projects requiring high testability and predictable state management. |
| VIPER | Strict single-responsibility modules (View, Interactor, Presenter, etc.). | Very large-scale projects with large teams, requires more boilerplate. |
Tooling and Automation for Consistent Quality
Enforcing Style with Linters and Formatters
Writing clean code is a discipline, but human error and differences in opinion are inevitable. This is where automated tooling becomes an indispensable partner. A linter is a tool that analyzes your code for stylistic errors, programming mistakes, and adherence to conventions. In the Swift ecosystem, SwiftLint is the undisputed standard. It can be integrated directly into Xcode and your CI/CD pipeline to enforce a shared set of rules across your entire team. It can flag issues like overly complex functions, force unwrapping optionals, or incorrect naming conventions. By catching these issues automatically, it elevates the conversation during code reviews from nitpicking about syntax to discussing the actual logic and architecture. A companion to a linter is a code formatter, such as SwiftFormat. A formatter automatically rewrites your code to conform to a specific style guide, handling things like indentation, spacing, and line breaks. This eliminates all arguments about code style and ensures the entire codebase has a single, consistent look and feel. Adopting these tools, which you can find at the official SwiftLint repository, removes cognitive friction and allows developers to focus on what truly matters: solving problems and building great software.
The Indispensable Role of Unit and UI Testing
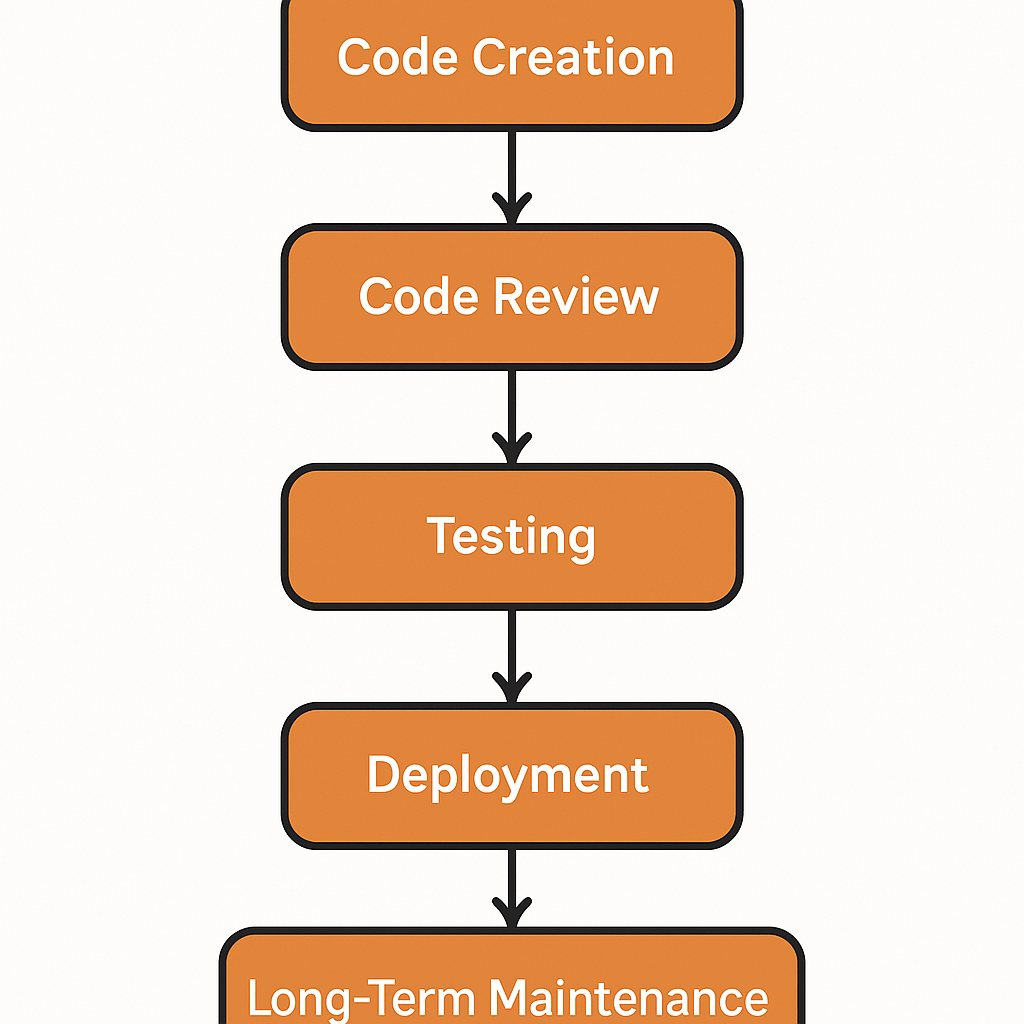
Clean code is testable code, and testable code is, by nature, clean. The two are inextricably linked. Writing tests forces you to design better, more decoupled code. If you find a piece of logic is difficult to test, it is a strong signal that it is too tightly coupled to its dependencies or is trying to do too much. Tests serve as a safety net, giving you the confidence to refactor and improve your code without fear of introducing regressions. Unit tests should form the foundation of your testing strategy. They are fast, reliable, and focus on testing individual components or functions in isolation, verifying that your business logic works as expected. This is where the patterns of Dependency Injection and Protocol-Oriented Programming pay off, as they make it easy to mock dependencies and test your logic thoroughly. UI tests, while slower and more brittle, are essential for verifying critical user flows from end to end. They ensure that the integration of your components works correctly and that users can accomplish key tasks within your app. The investment in writing tests pays for itself many times over by catching bugs early in the development cycle. As a 2021 study by the Consortium for Information & Software Quality (CISQ) highlighted, the cost of poor software quality in the US alone was an estimated $2.08 trillion. A robust test suite is one of the most effective tools we have to reduce that cost, ensuring a higher quality product and a more maintainable codebase.

The journey to clean code is not a destination but a continuous practice. It is a mindset of craftsmanship and professionalism that extends beyond just making the code work. It involves a commitment to clarity, simplicity, and maintainability. By embracing expressive naming, leveraging Swift’s powerful type system, adopting modern architectural patterns, and utilizing a robust suite of tools, you can build applications that are not only a joy for your users but also a pleasure for your team to build and maintain. As you move forward, challenge yourself and your team to leave the codebase just a little bit cleaner than you found it. This incremental, consistent effort is what builds truly great, enduring software.
Leave a Reply