Category: Blog

Blog

  • Swift Programming Best Practices for Clean Code in 2025

    Swift Programming Best Practices for Clean Code in 2025


    The Enduring Value of Clean Code in Swift Development

    In the fast-paced world of iOS and macOS development, the pressure to ship features can often overshadow the discipline required to write clean, maintainable code. Yet, as we look towards 2025, the principles of software craftsmanship are more relevant than ever. Clean code is not an academic exercise; it is a fundamental business imperative. It is the invisible architecture that determines whether an application can evolve gracefully or will crumble under the weight of its own complexity. Code is read far more often than it is written, and a codebase that is difficult to comprehend is a direct tax on future development. Every confusing variable name, every monolithic function, and every tightly coupled module adds friction, slowing down bug fixes and new feature implementation. This isn’t just a minor inconvenience; it has a significant financial impact. A 2022 report by Stripe, “The Developer Coefficient,” revealed that developers spend, on average, over 17 hours per week on maintenance tasks, a substantial portion of which is dedicated to navigating technical debt and what they term “bad code.” This is nearly half of a developer’s working week spent not on innovation, but on untangling the knots of past decisions. For a Swift developer, this means less time creating delightful user experiences and more time deciphering convoluted logic. As Swift continues to mature, with powerful features like structured concurrency and advanced generics, the potential for both elegant solutions and complex messes grows. Adhering to best practices ensures we harness the language’s power for good, building applications that are not only functional today but also resilient, scalable, and a pleasure to work on for years to come. A commitment to clean code is an investment in velocity, stability, and team morale.
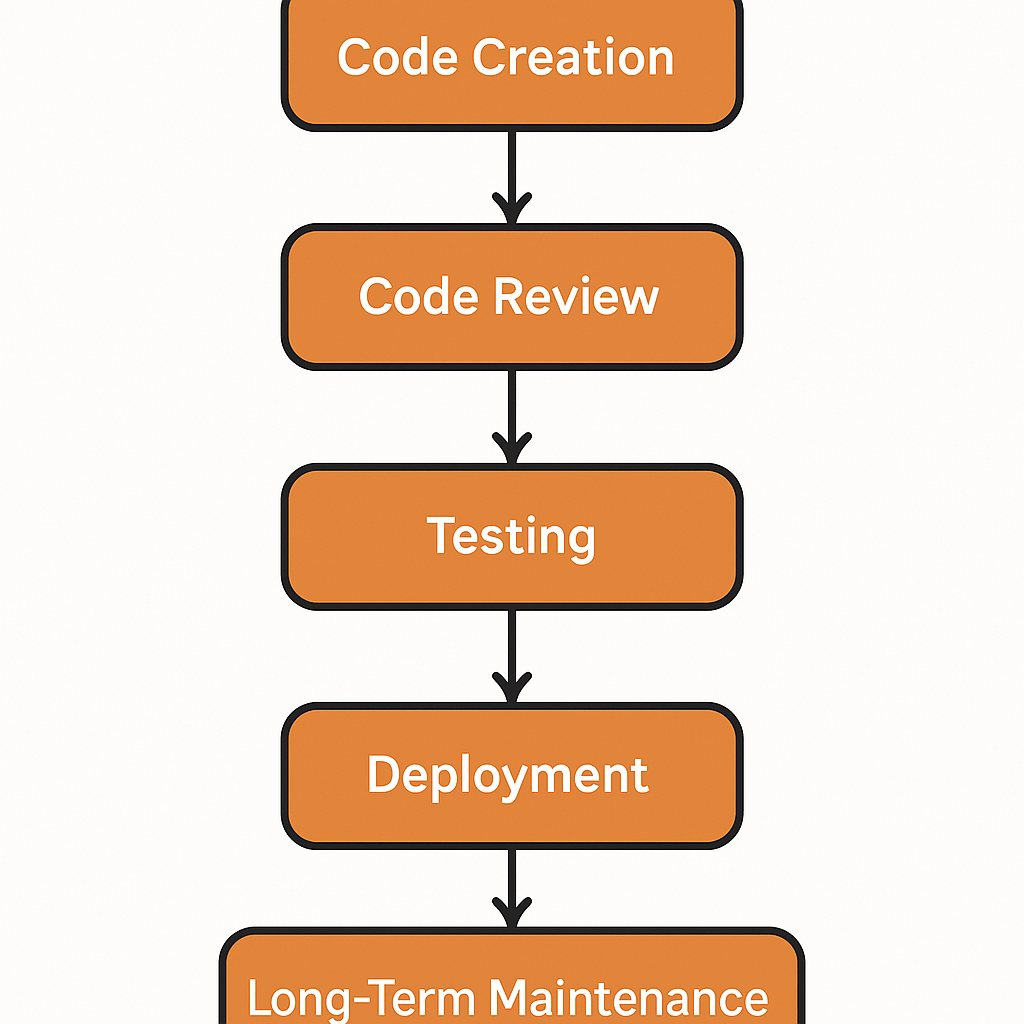
    A flowchart showing the lifecycle of code from creation to long-term maintenance


    Foundational Principles: Naming and Readability


    The Art of Expressive Naming


    The bedrock of readable code is clear, unambiguous naming. Swift itself champions this philosophy through its comprehensive API Design Guidelines, which famously state that clarity is more important than brevity. This principle should permeate every line of code you write. A variable named x or data offers no context, forcing the next developer (which might be you in six months) to hunt through the code to understand its purpose. In contrast, a name like userProfileImageData or pendingFriendRequests is self-documenting. The intent is immediately clear, reducing cognitive load and the potential for misunderstandings. When naming functions, strive for language that reads like a sentence, especially when used at the call site. For example, a function signature like func move(to: CGPoint) allows for a call that reads naturally: sprite.move(to: newPosition). This follows the principle of naming based on side effects. If a function returns a new value without changing the instance, it should be named as a noun (e.g., view.resized(to: newSize)). If it mutates the instance in place, it should be a verb (e.g., view.resize(to: newSize)). This consistency is vital. Class, struct, and enum names should be nouns that describe what the type represents, following PascalCase (e.g., UserProfile, NetworkConfiguration). Variables, constants, and function names should follow lowerCamelCase (e.g., firstName, loadConfiguration()). Investing a few extra seconds to find the perfect name pays dividends every time someone reads your code. This isn’t about being verbose for its own sake; it’s about precision and communication.
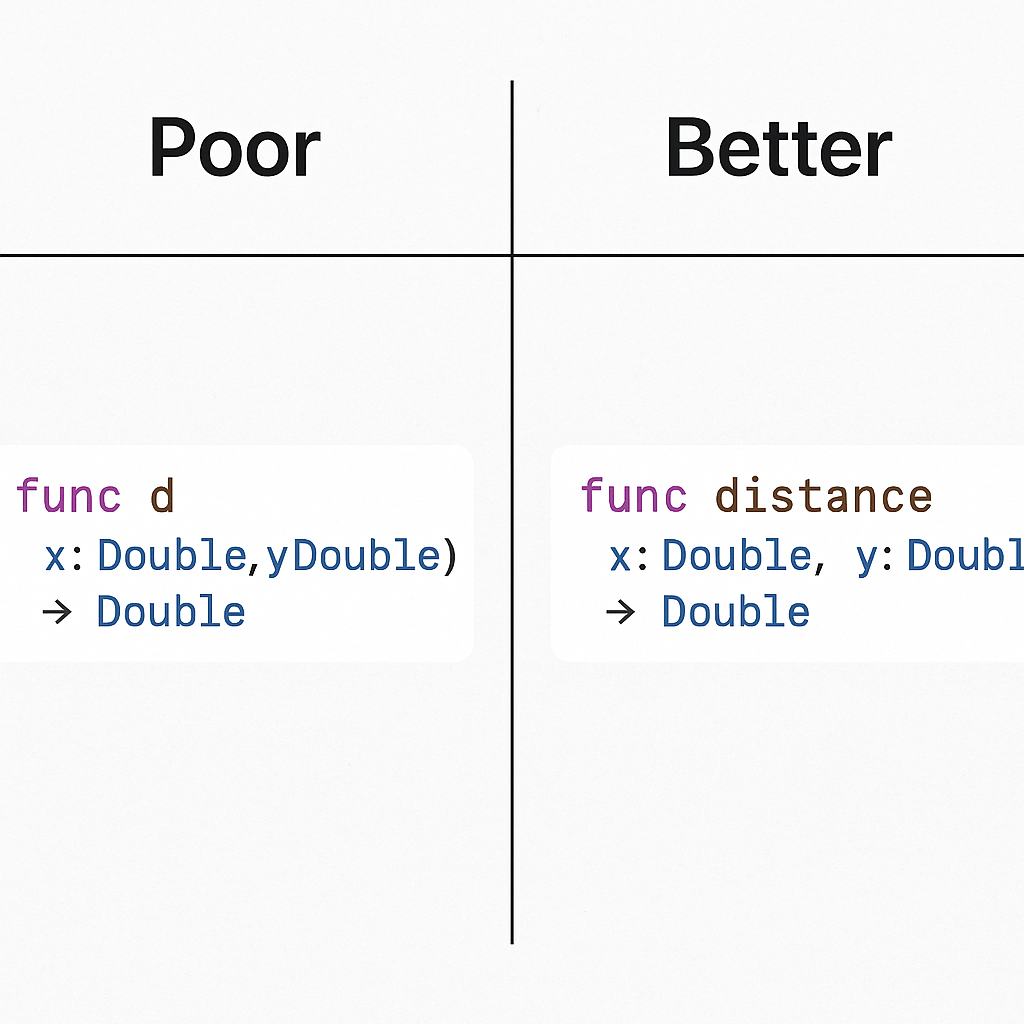
    A side-by-side comparison of a poorly-named Swift function and a well-named one


    Structuring Code for Clarity


    Beyond naming, the physical layout of your code within a file significantly impacts its readability. A large, monolithic file is intimidating and difficult to navigate. Swift provides a simple yet powerful mechanism for organizing code: the MARK, TODO, and FIXME comments. Using // MARK: - Section Name creates a distinct, navigable section in Xcode’s function menu, allowing you to group related properties, methods, protocol conformances, and initializers. This acts as a table of contents for your type. For instance, you can separate public API from private implementation details or group all UITableViewDataSource methods together. Vertical spacing is another critical tool. Use blank lines to separate logical chunks of code within a method, much like paragraphs in an essay. This visual separation helps the reader’s brain parse the code’s flow and identify distinct steps in an algorithm. Conversely, code that performs a single, cohesive task should be kept together. The goal is to create a visual rhythm that guides the reader through the logic. Finally, while modern displays are wide, excessively long lines of code are a classic readability killer. Forcing a reader to scroll horizontally breaks their concentration. Aim to keep lines under 100-120 characters. This often has the positive side effect of encouraging you to break down complex statements into smaller, more understandable parts, assigning intermediate results to well-named variables. A well-structured file is a map that guides the reader, making the journey through your logic effortless.


    Leveraging Swift’s Powerful Type System


    Embrace struct over class by Default


    One of the most significant shifts in Swift programming philosophy compared to its Objective-C predecessor is the emphasis on value types. Your default choice for modeling data should always be a struct, resorting to a class only when you specifically need the behaviors it provides. This “value semantics” approach has profound benefits for code clarity and safety. Structs are value types, meaning when you pass them around your application, a copy is made. This completely eliminates a whole category of bugs related to shared mutable state. You never have to worry that a function you passed a User struct to will unexpectedly change the user’s name in another part of your app. This makes your data flow predictable and easier to reason about, which is especially critical in concurrent environments where multiple threads could otherwise race to modify the same object. This copy-on-write behavior is also highly performant for most use cases, as structs are typically allocated on the stack, which is much faster than the heap allocation required for classes. So, when do you need a class? The primary reason is when you need to model identity. If you have an object that represents a specific, unique entity that needs to be shared and mutated from multiple places—like a local database connection or a shared view controller—a class is the appropriate tool. You also need classes for Objective-C interoperability or when you need to use features exclusive to classes, such as deinitializers. For a deeper understanding of Swift’s foundational types, reviewing an Introduction to Swift can be incredibly beneficial. By defaulting to structs, you create a safer, more predictable, and often more performant codebase.


    The Power of enum for State and Data Modeling


    Enums in Swift are far more powerful than their counterparts in many other languages. They are a first-class tool for modeling state and data with compile-time safety. Gone are the days of using booleans or optional strings to represent a finite set of states, a practice fraught with peril. An isLoading boolean and an optional error variable can easily lead to invalid states, such as being in an error state while also loading. Swift’s enums with associated values solve this elegantly. You can define a state machine that can only ever exist in one valid state at a time. For example, modeling the state of a network request becomes incredibly robust: enum ViewState { case loading; case loaded(T); case error(Error) }. With this definition, it is impossible for your view to be in both a loaded and an error state simultaneously. The compiler enforces this correctness. This pattern is invaluable for representing any situation with a discrete set of possible outcomes. It forces you to handle every case exhaustively in switch statements, preventing you from forgetting to handle a particular state. This compile-time checking eliminates a whole class of runtime bugs. Using enums to model your data turns the compiler into your trusted partner, ensuring that your logic correctly accounts for every possible scenario before your app even runs.

    Traditional Approach (Prone to Invalid States) Enum-based Approach (Compile-Time Safe)
    var isLoading: Bool = false enum LoadState {
    var items: [Item]? case idle
    var error: Error? case loading
    // Risk: isLoading can be true while error is not nil case loaded([Item])
    // Risk: items and error can both be non-nil case failed(Error)
    // Logic requires multiple if-let checks }
    var state: LoadState = .idle


    Modern Swift Patterns for Robustness and Scalability


    Mastering Error Handling with Result and async/await


    Swift’s error handling has evolved significantly, offering powerful and elegant ways to manage failures. While the traditional do-try-catch mechanism is still effective, the Result type, introduced in Swift 5, provides a more explicit and functional approach. Result is an enum that explicitly represents either a successful outcome with a value or a failure with an error. This is incredibly useful in asynchronous operations, where you want to pass the outcome of a task through a completion handler. Instead of a handler with two optional parameters like (Data?, Error?), which can lead to ambiguous states, a single Result parameter makes the outcome crystal clear. It can be either success or failure, never both or neither. This clarity extends to the call site, where a switch statement can exhaustively handle both outcomes. This pattern dovetails perfectly with Swift’s modern concurrency system, built around async/await. This syntax transforms asynchronous code, making it look and behave like synchronous code, eliminating the “pyramid of doom” of nested completion handlers. Functions can be marked with async throws, allowing them to be called with try await. This seamlessly integrates the throwing mechanism with structured concurrency, allowing errors to propagate up the call stack naturally. You can wrap these calls in a do-catch block or assign their outcome to a Result type, giving you the flexibility to choose the best error-handling strategy for the situation. For a deeper exploration of these powerful features, this guide to Swift Concurrency is an excellent resource.


    Dependency Injection and Protocol-Oriented Programming (POP)


    As applications grow, managing dependencies becomes a primary challenge. Dependency Injection (DI) is a design pattern that addresses this by decoupling components. Instead of a view controller creating its own networking service directly (a hard-coded dependency), the dependency is “injected” from the outside, typically during initialization. This simple change has a massive impact. It makes your code more modular, flexible, and, most importantly, testable. To make this work effectively in Swift, we lean heavily on Protocol-Oriented Programming (POP). Instead of depending on a concrete type like APINetworkService, our view controller should depend on a protocol, say, NetworkFetching. The APINetworkService class would then conform to this protocol. This abstraction is key. In your application, you inject the real APINetworkService. But in your tests, you can create a MockNetworkFetcher that also conforms to NetworkFetching and returns canned data or specific errors. This allows you to test your view controller’s logic in complete isolation, without making actual network calls. This combination of POP and DI is a cornerstone of modern Swift architecture. It avoids the rigidity of classical inheritance hierarchies and promotes composition over inheritance, a core tenet of Swift’s design. By defining dependencies as protocols, you create clean boundaries between your modules, making the entire system easier to understand, maintain, and test. For those looking to master these concepts, delving into Advanced Swift topics is a logical next step.
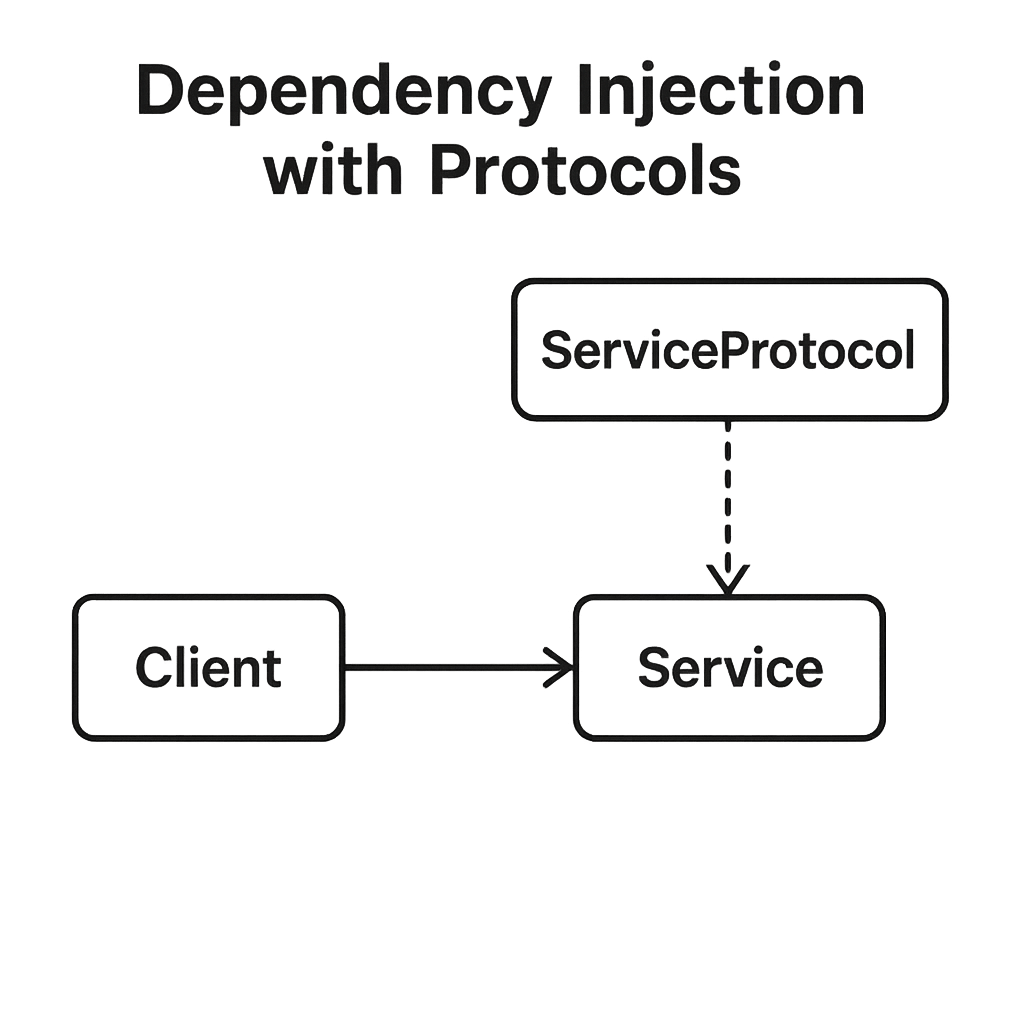
    Diagram illustrating Dependency Injection with protocols


    Architecting for the Future: SwiftUI and Beyond


    Writing Clean and Composable SwiftUI Views


    SwiftUI represents a paradigm shift in UI development for Apple’s platforms. Its declarative nature encourages a different way of thinking about structure and state. To write clean SwiftUI code, the Single Responsibility Principle is paramount. A SwiftUI view should do one thing and do it well. Avoid creating massive, monolithic body properties. Instead, break down complex UIs into smaller, reusable child views. This not only makes your code easier to read but also improves performance, as SwiftUI can be more intelligent about which parts of the view hierarchy need to be re-rendered when state changes. Understanding state management is also critical. Use the right property wrapper for the job. @State is for simple, transient view-specific state that is owned by the view. @Binding creates a two-way connection to a state owned by a parent view. @StateObject is used to create and own a reference-type view model for the lifetime of a view, while @ObservedObject is used to subscribe to an existing view model instance that is passed into the view. Misusing these can lead to subtle bugs and performance issues. A clean SwiftUI view is small, focused, and clearly defines its dependencies on the state it needs to render. If you are just starting your journey with this framework, Getting Started with SwiftUI provides the essential foundation.


    Adopting a Clear Architectural Pattern


    While SwiftUI handles the “V” in traditional patterns, a robust application still needs a clear architecture to manage business logic, data flow, and state. There is no single “best” architecture; the right choice depends on the scale and complexity of your project. Consistency is more important than the specific pattern you choose. The Model-View-ViewModel (MVVM) pattern is a popular and natural fit for SwiftUI, where the ViewModel (an ObservableObject) exposes state to the View and contains the business logic to transform Model data. For more complex applications with intricate state management and side effects, The Composable Architecture (TCA) offers a more prescriptive, functional approach that can lead to highly testable and predictable code. Other patterns like VIPER (View-Interactor-Presenter-Entity-Router) offer even stricter separation of concerns, which can be beneficial for very large teams and projects. You can find a great overview of common approaches in this article on iOS App Architecture. The goal of any architecture is to create a clear separation of concerns. Your UI code should not be making network calls, and your networking layer should not know about UIColor. By establishing these boundaries, you create a system where components can be developed, tested, and replaced independently, allowing the application to scale without collapsing under its own weight.

    Pattern Key Characteristic Best For
    MVVM Binds Views to ViewModels, which expose state and actions. Small to large projects, natural fit for SwiftUI and Combine.
    TCA Unidirectional data flow, manages state, actions, and side effects. Projects requiring high testability and predictable state management.
    VIPER Strict single-responsibility modules (View, Interactor, Presenter, etc.). Very large-scale projects with large teams, requires more boilerplate.


    Tooling and Automation for Consistent Quality


    Enforcing Style with Linters and Formatters


    Writing clean code is a discipline, but human error and differences in opinion are inevitable. This is where automated tooling becomes an indispensable partner. A linter is a tool that analyzes your code for stylistic errors, programming mistakes, and adherence to conventions. In the Swift ecosystem, SwiftLint is the undisputed standard. It can be integrated directly into Xcode and your CI/CD pipeline to enforce a shared set of rules across your entire team. It can flag issues like overly complex functions, force unwrapping optionals, or incorrect naming conventions. By catching these issues automatically, it elevates the conversation during code reviews from nitpicking about syntax to discussing the actual logic and architecture. A companion to a linter is a code formatter, such as SwiftFormat. A formatter automatically rewrites your code to conform to a specific style guide, handling things like indentation, spacing, and line breaks. This eliminates all arguments about code style and ensures the entire codebase has a single, consistent look and feel. Adopting these tools, which you can find at the official SwiftLint repository, removes cognitive friction and allows developers to focus on what truly matters: solving problems and building great software.


    The Indispensable Role of Unit and UI Testing


    Clean code is testable code, and testable code is, by nature, clean. The two are inextricably linked. Writing tests forces you to design better, more decoupled code. If you find a piece of logic is difficult to test, it is a strong signal that it is too tightly coupled to its dependencies or is trying to do too much. Tests serve as a safety net, giving you the confidence to refactor and improve your code without fear of introducing regressions. Unit tests should form the foundation of your testing strategy. They are fast, reliable, and focus on testing individual components or functions in isolation, verifying that your business logic works as expected. This is where the patterns of Dependency Injection and Protocol-Oriented Programming pay off, as they make it easy to mock dependencies and test your logic thoroughly. UI tests, while slower and more brittle, are essential for verifying critical user flows from end to end. They ensure that the integration of your components works correctly and that users can accomplish key tasks within your app. The investment in writing tests pays for itself many times over by catching bugs early in the development cycle. As a 2021 study by the Consortium for Information & Software Quality (CISQ) highlighted, the cost of poor software quality in the US alone was an estimated $2.08 trillion. A robust test suite is one of the most effective tools we have to reduce that cost, ensuring a higher quality product and a more maintainable codebase.

    A pyramid diagram showing the ideal ratio of Unit, Integration, and UI tests

    The journey to clean code is not a destination but a continuous practice. It is a mindset of craftsmanship and professionalism that extends beyond just making the code work. It involves a commitment to clarity, simplicity, and maintainability. By embracing expressive naming, leveraging Swift’s powerful type system, adopting modern architectural patterns, and utilizing a robust suite of tools, you can build applications that are not only a joy for your users but also a pleasure for your team to build and maintain. As you move forward, challenge yourself and your team to leave the codebase just a little bit cleaner than you found it. This incremental, consistent effort is what builds truly great, enduring software.

  • Swift Programming Interview Questions: Top Tips for 2025

    Swift Programming Interview Questions: Top Tips for 2025


    Navigating the Modern Swift Interview Landscape

    The landscape of Swift and iOS development interviews has evolved significantly. Gone are the days of simply reciting language definitions. In 2025, hiring managers are looking for engineers who possess a deep, practical understanding of the Swift language, its powerful concurrency features, and modern architectural principles. The emphasis has shifted from “what” to “why” and “how.” Companies want to see that you can not only solve a problem but also design a robust, scalable, and maintainable solution. The rise of declarative UI with SwiftUI and the introduction of a new concurrency model with async/await have reshaped the core competencies required of a top-tier candidate. According to the JetBrains “The State of Developer Ecosystem 2023” report, SwiftUI is now used by 42% of Swift developers, a clear indicator that proficiency in this framework is no longer optional but a firm expectation for many roles. This modern interview demands a holistic approach, blending strong foundational knowledge with an awareness of the latest ecosystem trends. You must be prepared to discuss trade-offs, defend your architectural choices, and demonstrate a forward-thinking mindset. This means understanding not just how to implement a feature, but how that feature fits within the larger context of an application, considering performance, memory management, and user experience.

    Developer at a whiteboard planning an app architecture


    Core Swift Language Fundamentals

    A deep command of Swift’s core principles remains the bedrock of any successful interview. While shiny new frameworks are important, a misunderstanding of the fundamentals will quickly be exposed under technical scrutiny. These concepts are not just trivia; they directly influence the performance, safety, and design of your code every single day. Interviewers will probe your knowledge here to gauge the depth of your expertise and your ability to write efficient, idiomatic Swift code.


    Value vs. Reference Types (struct vs. class)


    One of the most fundamental and frequently asked questions revolves around the distinction between value types (primarily structs and enums) and reference types (classes). The core difference lies in how they are stored and passed around in your code. Value types are copied when they are assigned to a new variable or passed into a function, meaning the new variable has its own independent copy of the data. This happens on the stack, which is very fast for allocation and deallocation. In contrast, reference types are not copied. When you assign a class instance to a new variable, both variables point to the exact same instance in memory, stored on the heap. This is a shared reference, and a change made through one variable will be visible to the other.

    A common interview question is: “When would you choose a struct over a class, and why?” The answer reveals your understanding of performance, data modeling, and thread safety. You should generally prefer structs because they are simpler and safer. Since they are copied, you don’t have to worry about another part of your app changing your data unexpectedly, which makes them inherently more thread-safe. They are perfect for modeling data that doesn’t have a distinct identity, like a Point in a coordinate system or a Color value. Use a class when you need a single, shared, mutable state. This is common for objects that represent a unique entity, like a UserProfileManager or a NetworkService, where there should only be one “source of truth.” You should also mention Copy-on-Write (CoW), an optimization Swift uses for large value types like arrays and dictionaries, where the data is only truly copied when it is about to be modified, providing performance benefits. A strong answer demonstrates an appreciation for this “default to value types” philosophy central to modern Swift.

    Struct vs. Class Memory Allocation Diagram


    Optionals and Unwrapping


    Swift’s approach to handling the absence of a value is a major feature that promotes safety and prevents null pointer exceptions common in other languages. Optionals are a core concept you must master. An optional is essentially a wrapper that can either contain a value or be nil. Interviewers will test your ability to work with them safely and efficiently. The most dangerous operation is force unwrapping using the ! operator. While it has its uses, such as when you are absolutely certain a value exists (e.g., an outlet connected in a storyboard), its overuse is a red flag, indicating a disregard for safety.

    Your discussion should focus on safe unwrapping techniques. Optional binding with if let and guard let is the most common and preferred method. if let unwraps the optional and executes a block of code if a value exists. guard let is even more powerful for promoting early exits; it unwraps the optional, and if it’s nil, it forces you to exit the current scope (e.g., with return or throw), making your code cleaner and avoiding deeply nested if statements. Another key technique is optional chaining (?), which allows you to call properties, methods, and subscripts on an optional that might currently be nil. If the optional is nil, the entire chain gracefully fails and returns nil without crashing. The nil-coalescing operator (??) is also crucial. It provides a default value if the optional is nil, allowing you to unwrap and provide a fallback in a single, concise line of code. Being able to articulate the specific use case for each of these techniques is a sign of a mature Swift developer.


    Memory Management: ARC Explained


    Swift uses Automatic Reference Counting (ARC) to manage memory usage. Unlike garbage collection, which periodically scans for and cleans up unused objects, ARC works deterministically by keeping a count of how many active references there are to each class instance. When the reference count for an instance drops to zero, meaning nothing is holding onto it, the memory is deallocated immediately. While ARC handles most memory management for you, it is not a magic bullet. The most critical topic to understand is retain cycles, also known as strong reference cycles. This occurs when two or more class instances hold a strong reference to each other, creating a “loop” where their reference counts can never drop to zero, even when they are no longer needed by the rest of the application. This results in a memory leak.

    A classic interview question is: “Describe a scenario that leads to a retain cycle and how you would resolve it.” The most common example involves a class and a closure. If a class property is a closure, and that closure captures a strong reference to the class instance (by using self inside it), you create a retain cycle. The class owns the closure, and the closure owns the class. To break this cycle, you must use a capture list. You declare one of the references as either weak or unowned. A weak reference is an optional reference that does not increase the reference count. It automatically becomes nil when the instance it refers to is deallocated. An unowned reference is similar but is non-optional and assumes the referenced object will always exist for the lifetime of the reference. Using unowned when the object could be nil will cause a crash. Your ability to explain the difference between weak and unowned and when to use each—weak when the reference can become nil, unowned when you can guarantee it won’t—demonstrates a deep understanding of Swift’s memory model.


    Protocols and Generics


    Swift is often described as a Protocol-Oriented Programming (POP) language, and for good reason. Protocols define a blueprint of methods, properties, and other requirements that suit a particular task or piece of functionality. They are a powerful tool for abstraction, allowing you to write flexible and decoupled code. Instead of relying on a rigid class hierarchy through inheritance, you can define behavior through protocols and have any struct, class, or enum adopt them. This enables polymorphism for value types, a significant advantage over traditional object-oriented programming.

    Generics are another cornerstone of Swift’s power, allowing you to write flexible, reusable functions and types that can work with any type, subject to specified constraints. When combined with protocols, they become incredibly expressive. A common modern interview topic is the difference between some Protocol and any Protocol, which were refined in recent Swift versions. some Protocol is an opaque type, which means the function returns a concrete type that conforms to the protocol, but the caller doesn’t need to know the specific type. The key is that the underlying type is fixed for a given return. any Protocol is an existential type, which acts as a wrapper (or “box”) that can hold any concrete type conforming to the protocol. This provides more flexibility but can come with a performance cost due to the need for dynamic dispatch. Explaining this distinction shows you are up-to-date with the evolution of the language. To deepen your foundational knowledge, an Introduction to Swift can be an excellent refresher.


    Concurrency: From GCD to Async/Await

    Concurrency has always been a challenging aspect of application development, and Swift’s approach has undergone a revolutionary transformation. An understanding of this evolution, from older patterns to the modern structured concurrency model, is absolutely critical for any mid-level or senior iOS role in 2025. Interviewers will expect you to be fluent in the new syntax and, more importantly, to understand the problems it solves.


    The Evolution of Concurrency in Swift


    For years, iOS developers relied on Grand Central Dispatch (GCD) and Operation Queues for concurrent and asynchronous tasks. GCD is a powerful, low-level C-based API that manages queues of tasks, allowing you to easily dispatch work to background threads to avoid blocking the main UI thread. While effective, it often led to complex, nested completion handlers, a pattern infamously known as the “Pyramid of Doom” or “Callback Hell.” This made code difficult to read, reason about, and debug. Error handling was also cumbersome, often requiring custom error-passing conventions within completion handlers. Operation Queues provided a higher-level, object-oriented abstraction over GCD, allowing for more complex operations with dependencies, but the fundamental challenges of callback-based asynchronous programming remained. Recognizing these pain points, Apple introduced a completely new concurrency model built directly into the Swift language.


    Mastering Async/Await


    The centerpiece of Swift’s modern concurrency model is the async/await syntax. This provides a way to write asynchronous code that reads like synchronous, sequential code. When you call a function marked with async, you use the await keyword to pause the execution of the current function until the asynchronous function completes and returns a value. Behind the scenes, the system can suspend your function and use the thread for other work, making it incredibly efficient. This completely eliminates the need for nested completion handlers. Error handling is also dramatically simplified, as async functions can throw errors, which can be caught using a standard do-catch block, just like synchronous code. A typical interview question might be: “Rewrite this closure-based network call using async/await and explain the benefits.” Your answer should highlight improved readability, simplified error handling, and the elimination of the Pyramid of Doom, leading to more maintainable and less error-prone code.


    Understanding Actors and Data Races


    One of the biggest challenges in concurrent programming is managing shared mutable state. When multiple threads try to access and modify the same piece of data at the same time, it can lead to a data race, resulting in corrupted data, unpredictable behavior, and crashes. Historically, this was managed using locks, semaphores, or serial dispatch queues to ensure that only one thread could access the data at a time. These mechanisms are powerful but are notoriously difficult to use correctly and can easily lead to deadlocks.

    To solve this problem, Swift introduced Actors. An actor is a special kind of reference type that protects its state from concurrent access. All access to an actor’s mutable properties and methods must be done asynchronously. When you call a method on an actor from the outside, you must await the call. The actor system ensures that only one piece of code is running inside the actor at a time, effectively creating a synchronized “island” for your mutable state. This synchronization is handled automatically, eliminating the need for manual locking and preventing data races at compile time. Being able to explain that an actor is a synchronization primitive that serializes access to its internal state is key to demonstrating your grasp of modern Swift concurrency.


    Architectural Patterns and System Design

    Beyond language syntax, interviewers want to assess your ability to structure an application. System design questions test your understanding of high-level concepts, software architecture, and the trade-offs involved in building scalable and maintainable apps. Your choice of architecture impacts testability, scalability, and how easily new developers can contribute to the codebase.


    Common iOS Design Patterns


    You should be prepared to discuss and compare several common architectural patterns. The most traditional is Model-View-Controller (MVC), which Apple has long used in its frameworks. In MVC, the Model represents the data, the View is the UI, and the Controller acts as the intermediary. However, in UIKit, the View and Controller are often tightly coupled in the UIViewController, leading to a common problem known as the “Massive View Controller.”

    To address this, patterns like Model-View-ViewModel (MVVM) have gained immense popularity, especially with the rise of SwiftUI. In MVVM, the ViewModel sits between the Model and the View. It prepares and provides data from the Model in a format that the View can display directly, often through data binding. The View’s role becomes very simple: it just reflects the state of the ViewModel. This separation makes the view logic much easier to test, as the ViewModel has no direct dependency on the UI. Another pattern you might discuss is VIPER (View, Interactor, Presenter, Entity, Router), which provides even greater separation of concerns but at the cost of increased complexity and boilerplate. For most interviews, a deep understanding of the pros and cons of MVC and MVVM is sufficient.

    Pattern Key Responsibility Separation Testability Common Use Case
    MVC Model (Data), View (UI), Controller (Mediator) Moderate; “Massive View Controller” can be hard to test. Traditional UIKit applications.
    MVVM Model (Data), View (UI), ViewModel (Presentation Logic) High; ViewModel is independent of the UI. SwiftUI, or UIKit with reactive frameworks.
    VIPER View, Interactor, Presenter, Entity, Router Very High; single responsibility for each component. Large, complex applications requiring strict boundaries.
    MVVM Architecture Diagram


    Dependency Injection


    Dependency Injection (DI) is a design pattern used to implement Inversion of Control, where the responsibility of creating dependencies is transferred from the object itself to an external entity. In simpler terms, instead of an object creating its own dependencies (e.g., a ViewModel creating its own NetworkService), those dependencies are “injected” or passed into it from the outside. The primary benefit of this is loose coupling. Your objects are no longer tied to specific implementations of their dependencies, making your code more modular, flexible, and, most importantly, testable. During unit testing, you can easily inject mock or fake versions of dependencies (like a mock network service that returns canned data) to isolate the object you are testing.

    There are several ways to implement DI: Initializer Injection, where dependencies are passed in through the init method, is the most common and robust approach as it ensures the object is in a valid state upon creation. Property Injection, where dependencies are set via public properties, is more flexible but can leave the object in an incomplete state. Method Injection involves passing the dependency as a parameter to a specific method that needs it. Your ability to explain why DI is crucial for writing testable code is a strong signal of a senior-level mindset.


    Frameworks and Ecosystem Knowledge

    A proficient Swift developer is not just an expert in the language but also in the broader Apple ecosystem. This includes a solid understanding of key frameworks for UI, networking, and data persistence, as well as the ability to make informed decisions about when to use which tool.


    SwiftUI vs. UIKit


    One of the biggest topics in the iOS world today is the relationship between SwiftUI and UIKit. UIKit is the older, imperative framework where you build your UI by creating and manually manipulating a hierarchy of view objects. SwiftUI is Apple’s newer, declarative framework. With SwiftUI, you describe what your UI should look like for a given state, and the framework automatically figures out how to render and update it when the state changes. This leads to more concise, readable, and less error-prone UI code.

    However, the reality of iOS development in 2025 is that most large, mature applications are still heavily reliant on UIKit, while new features and new apps are increasingly being built with SwiftUI. Therefore, a crucial skill is understanding how to make them interoperate. You can host a SwiftUI view inside a UIKit hierarchy using UIHostingController, and you can embed a UIKit view or view controller within a SwiftUI view hierarchy using UIViewRepresentable and UIViewControllerRepresentable. An interviewer might ask, “When might you need to fall back to UIKit in a modern SwiftUI app?” A good answer would mention scenarios where you need access to a specific UIKit component that has no SwiftUI equivalent yet, or when you need to integrate with a third-party SDK that only provides UIKit views.


    Networking and Data Persistence


    Nearly every application needs to communicate with a server and store data locally. For networking, URLSession is the go-to framework. You should be comfortable explaining how to construct a URLRequest, execute it with URLSession, and handle the response. A key skill is parsing JSON data into your Swift data models. The Codable protocol makes this incredibly straightforward, allowing you to decode JSON into your structs and classes with minimal code. With modern concurrency, you can now use the data(for: URLRequest) method on URLSession, which is an async function, making network calls cleaner than ever. For a practical guide on this, exploring Networking with SwiftUI can be very beneficial.

    For data persistence, you should be familiar with a range of options. UserDefaults is suitable for storing small pieces of data, like user settings. For storing custom objects or larger amounts of data, you can use the file system by encoding your Codable objects to data and writing them to disk using FileManager. For more complex, database-like needs, Apple’s Core Data is a powerful and mature object graph management framework. While it has a steep learning curve, understanding its basic concepts like NSManagedObjectContext and the main-thread-only rule is important. Other popular third-party options like Realm or SQLite are also worth knowing about. The key is to understand the trade-offs of each option and to be able to choose the right tool for the job.


    Beyond the Code: The Behavioral Interview

    Technical prowess is only half the battle. Companies hire people, not just programmers. The behavioral interview is designed to assess your soft skills: communication, teamwork, problem-solving abilities, and passion for your craft. Be prepared to talk about your past experiences in detail. A common and effective technique for structuring your answers is the STAR method: Situation (describe the context), Task (explain your responsibility), Action (detail the steps you took), and Result (quantify the outcome).

    You can expect questions like, “Tell me about a time you had a disagreement with a team member and how you resolved it,” “Describe a complex bug you had to fix,” or “How do you keep your skills up-to-date?” When answering, be specific and honest. Instead of saying “I fixed a bug,” explain what the bug was, your process for debugging it (e.g., using breakpoints, reading logs), what the root cause was, and what you learned from it. When discussing how you stay current, mention specific resources you follow, such as official documentation from Apple’s Swift Documentation, proposals from Swift Evolution, blogs, podcasts, or conferences. This shows genuine curiosity and a commitment to professional growth. You can find more tips on how to ace the assessment portion of your interview from trusted career resources.

    Two developers collaborating in front of a computer


    Your Preparation Checklist for 2025

    Success in a Swift interview comes from deliberate and structured preparation. Simply reading articles is not enough; you need to actively engage with the material and practice applying your knowledge. Create a study plan that covers the key areas we’ve discussed and methodically work through it. Start by solidifying your understanding of the basics and then move on to more complex topics.

    Your checklist should include hands-on practice. Build a small project or add a new feature to an existing one using modern best practices. For example, refactor a closure-based network layer to use async/await and actors. Implement a feature using SwiftUI and MVVM. This practical experience is invaluable and provides you with concrete examples to discuss during your interview. It’s also critical to review and practice data structures and algorithms, as some companies still include these types of questions. Finally, don’t neglect the behavioral aspect. Think about your past projects and prepare stories that showcase your skills and experience using the STAR method. Mock interviews with peers or mentors can be incredibly helpful for refining your answers and getting comfortable under pressure.

    Preparation Area Key Activities Recommended Focus
    Core Language Review Swift documentation, build small command-line tools. Value/Reference types, ARC, Optionals, Protocols, Generics.
    Concurrency Refactor old projects from GCD/closures to async/await. Actors, Structured Concurrency, Task management.
    Architecture Whiteboard the architecture for a sample app. MVVM vs. MVC, Dependency Injection, SOLID principles.
    Frameworks Create a multi-screen app using SwiftUI and URLSession. SwiftUI, UIKit Interoperability, Codable, Core Data basics.
    Problem Solving Practice on platforms like LeetCode or HackerRank. Array/String manipulation, common data structures.
    Behavioral Prepare 3-5 stories using the STAR method. Teamwork, problem resolution, learning from failure.

    Ultimately, the goal is not just to answer questions correctly but to demonstrate that you are a thoughtful, knowledgeable, and collaborative engineer who can be a valuable asset to the team. By focusing on a deep understanding of these core areas, from language fundamentals to high-level architecture, you’ll be well-equipped to tackle any challenge the 2025 Swift interview process throws your way. For those looking to take their skills to the next level, a dedicated learning path like Advanced Swift can provide the structured, in-depth knowledge needed to truly stand out. Your journey to landing that dream role starts with dedicated preparation, so begin today and invest in your future.

  • PHP Array Examples for Beginners: Practical Code Samples

    PHP Array Examples for Beginners: Practical Code Samples


    Understanding the Core of PHP Data Structures

    Arrays are a fundamental building block in PHP, and mastering them is a critical step for any aspiring web developer. According to W3Techs, as of late 2023, PHP is used by 77.4% of all the websites whose server-side programming language we know. This widespread use makes proficiency in its core features, like arrays, absolutely essential. An array is a special type of variable designed to hold more than one value at a time, organized in a list-like structure. This allows you to group related items together, making your code more organized and efficient. PHP supports three primary types of arrays, each serving a different purpose: indexed arrays, which use numeric keys for ordering; associative arrays, which use named, descriptive keys; and multidimensional arrays, which are essentially arrays that contain other arrays. Understanding how to create, manipulate, and iterate over these powerful data structures is a cornerstone of effective PHP programming and will unlock more advanced capabilities.


    Indexed Arrays: The Ordered List


    Creating an Indexed Array


    Indexed arrays are the simplest form of arrays in PHP. They store a collection of values in a linear sequence, and each value is assigned a numeric index, which automatically starts at zero. Think of it like a numbered list where the first item is at position 0, the second at position 1, and so on. This makes them ideal for storing ordered data, such as a list of product names, user IDs, or daily temperature readings. Creating one is straightforward, and their predictable structure makes them easy to loop through using standard for or foreach loops.

    Indexed Array Visualization


    Accessing and Modifying Elements


    Once you have an indexed array, you’ll need to interact with its elements. Accessing a specific value is done by referencing its index inside square brackets. For example, to get the first element, you would use its index of 0. Modifying an existing element is just as simple; you just assign a new value to that specific index. Adding a new element to the end of the array is even easier. You can use empty square brackets, and PHP will automatically append the new value with the next available numeric index, saving you the trouble of tracking the array’s length manually.


    Associative Arrays: Key-Value Pairs


    Defining Associative Arrays


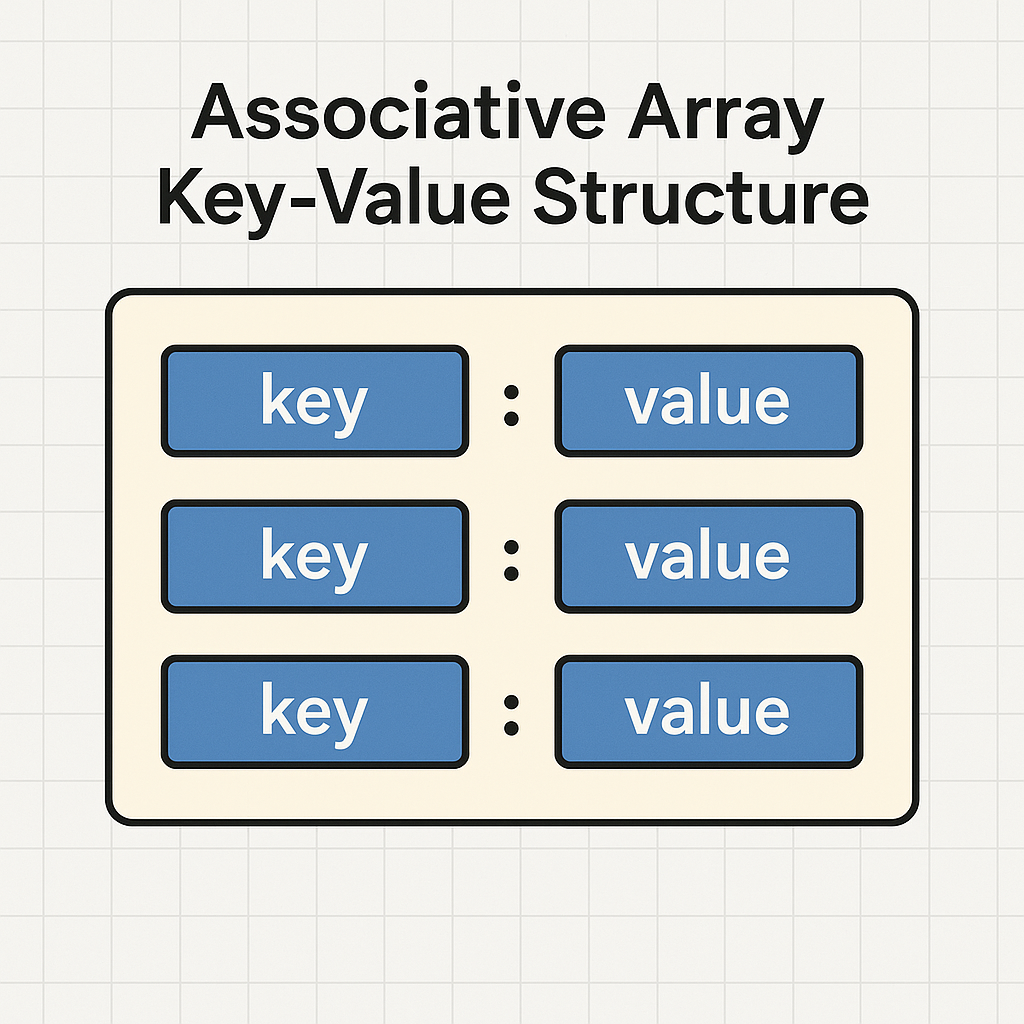
    While indexed arrays are great for ordered lists, associative arrays provide a more descriptive and meaningful way to store data. Instead of using numeric indices, you assign a custom string key to each value, creating a collection of key-value pairs. This is incredibly useful for storing data that has a clear relationship, such as the properties of an object. For instance, you could store a user’s information with keys like ‘firstName’, ‘lastName’, and ’email’. This self-documenting structure makes your code much more readable and easier to maintain than trying to remember that index 0 is the first name and index 2 is the email address.

    Associative Array Key-Value Structure


    Practical Use Cases


    The real power of associative arrays becomes evident in practical applications. They are perfect for managing configuration settings, processing form data from $_POST superglobals, or handling data fetched from an API or database. When a database query returns a single record, it’s often structured as an associative array where column names are the keys and a row’s data are the values. This intuitive mapping makes it simple to extract and use specific pieces of information without relying on their numerical order. We leverage this approach extensively in the custom web applications you can see in Our Work, ensuring our code is both efficient and maintainable.


    Multidimensional Arrays: Arrays within Arrays


    Building Complex Data Structures


    Multidimensional arrays take the concept a step further by allowing you to store arrays within other arrays. This creates a more complex, layered data structure that can represent grids, tables, or hierarchical data. A common example is a two-dimensional array, which can be thought of as a table with rows and columns. You might use one to store a list of products, where each product is itself an associative array containing its name, price, and stock quantity. This allows you to group and manage highly structured, related data within a single variable.

    Multidimensional Array Matrix


    Looping Through Nested Data


    Accessing elements in a multidimensional array requires chaining the keys or indices. For a two-dimensional array, you would use a first set of square brackets to specify the “row” and a second set to specify the “column” or inner key. While this can seem complex at first, it provides a powerful way to model real-world data. To process all the data within such a structure, you typically need to use nested loops. A common pattern is to use an outer foreach loop to iterate through the main array (the rows) and an inner foreach loop to iterate through each nested array (the columns or properties).


    Essential Array Functions You Must Know

    PHP comes with a rich library of built-in functions that make array manipulation incredibly efficient. Instead of writing complex loops to perform common tasks, you can leverage these pre-built tools. Functions for counting elements, adding or removing items, merging multiple arrays, or sorting data are just a few examples. Learning to use these functions effectively is a hallmark of a proficient PHP developer, as it leads to cleaner, more concise, and less error-prone code. They are your best friend for handling data transformations and inquiries quickly.

    Function Description
    count() Returns the number of elements in an array.
    array_push() Adds one or more elements onto the end of an array.
    array_pop() Removes and returns the last element of an array.
    array_merge() Merges one or more arrays into one.
    in_array() Checks if a specified value exists in an array.
    sort() Sorts an array in ascending order.

    For a complete list, the official PHP array documentation is an indispensable resource.


    Practical Application and Further Learning

    Arrays are not just a theoretical concept; they are used everywhere in real-world web development. When a user submits a form on your website, the data is collected into the $_POST or $_GET superglobal arrays. When you fetch a list of articles from your database to display on a blog, the result is almost always an array of associative arrays. Understanding how to handle these structures is non-negotiable for building dynamic websites. Practice is key to building confidence.

    Try creating your own arrays and manipulating them with different functions. As you become more comfortable, you’ll see how they form the backbone of countless web application features. Explore open-source projects on platforms like GitHub or read tutorials on Smashing Magazine to see arrays in action. At Lucid Site Designs, we believe in building robust and scalable applications, and that process always starts with a solid foundation in fundamental data structures like arrays. If you are ready to apply these concepts to a real project or need expert guidance, we encourage you to Contact Us.

  • jQuery Form Validation with Custom Rules – Tutorial & Tips

    jQuery Form Validation with Custom Rules – Tutorial & Tips


    The Foundation of Reliable User Input

    Web forms are the primary channel for user interaction and data collection on any website, from a simple contact form to a complex e-commerce checkout. Ensuring the data submitted through these forms is accurate, complete, and properly formatted is crucial for both data integrity and a positive user experience. While HTML5 provides native validation attributes, they often lack the flexibility and sophisticated logic required for modern applications. This is where the jQuery Validate plugin excels, offering a robust framework for both standard and highly customized validation logic. Implementing effective validation prevents bad data from reaching your server, reduces user frustration by providing immediate feedback, and ultimately guides users to successfully complete their tasks. According to the Baymard Institute, 17% of users have abandoned an online purchase solely due to a long or complicated checkout process, a problem that clear, real-time validation directly addresses (Baymard Institute, 2023). Before diving into custom rules, it is essential to have the basic library and plugin in place. You will need to include the core jQuery library followed by the jQuery Validate plugin script in your HTML file, typically just before the closing body tag.

    ![Image: HTML structure showing script includes for jQuery and jQuery Validate]

    Once the scripts are included, you can initialize the validation on any form by selecting it with a jQuery selector and calling the .validate() method. This simple call is enough to enable default validation for standard HTML5 attributes like required or type="email".


    Building Custom Validation Logic with addMethod

    The true power of the jQuery Validate plugin is unlocked when you move beyond its built-in rules. For scenarios requiring specific formats, business logic, or external checks, you must create your own rules. The plugin provides a straightforward way to do this using the $.validator.addMethod() function. This function is the cornerstone of custom validation, allowing you to define a reusable rule that can be applied to any form element on your site. Understanding its structure is the first step toward mastering form validation.


    The addMethod Syntax


    The $.validator.addMethod() function accepts three parameters: the name of your new rule, the validation function itself, and a default error message. The validation function receives the current value of the form element, the element itself, and any parameters you pass to the rule. This function must return true if the element’s value is valid and false if it is not. The message parameter is a string that will be displayed to the user when validation fails, and it can include placeholders for any parameters passed to the rule.

    Parameter Type Description
    name String The unique name for your custom validation rule (e.g., ‘strongPassword’).
    method Function The callback function that performs the validation logic. Returns true for valid, false for invalid.
    message String The default error message to display when validation fails.


    Practical Example: A Strong Password Rule


    A common requirement is to enforce a strong password policy. For instance, you might require a password to be at least eight characters long and contain a mix of uppercase letters, lowercase letters, and numbers. While the plugin has a minlength rule, the character composition check requires a custom method. We can define a rule called strongPassword that uses a regular expression to test the password’s complexity. This approach provides immediate, client-side feedback to the user as they type, helping them create a secure password without a frustrating trial-and-error submission process. This enhances security and improves the user’s journey.

    ![Image: Code snippet for a custom password validation rule]


    Advanced Example: Real-time Username Availability with AJAX


    Another powerful application of custom validation is checking for unique values, such as a username or email address, against your database. This prevents users from signing up with an identifier that is already taken. This can be accomplished by creating a custom rule that makes an asynchronous (AJAX) request to a server-side script. The script checks the database and returns a response, typically true or false, indicating availability. The jQuery Validate plugin handles asynchronous rules gracefully, waiting for the server’s response before completing validation. This gives the user instant feedback on their chosen username, which is a significant improvement over waiting until they submit the entire form.


    Applying and Customizing Your New Rules

    Once you have defined your custom methods using $.validator.addMethod(), you need to apply them to your form fields. This is done within the rules object when you initialize the validator with the .validate() method. For each field you want to validate, you specify the rules that apply. For our custom strongPassword rule, you would simply add strongPassword: true to the rules for the password input field.

    Rule Description
    required Makes the element required.
    email Requires the element to have a valid email format.
    minlength Requires the element to have a minimum length.
    equalTo Requires the element to have the same value as another element.
    remote Performs a remote (AJAX) validation.

    You can also override the default error messages on a per-field basis using the messages object. This allows you to provide more context-specific feedback. For example, instead of a generic “Please enter a valid value,” you could say, “Your password must contain at least one number and one uppercase letter.” Clear, helpful messages are a critical component of a user-friendly form. The documentation for the jQuery Validate plugin provides a comprehensive list of all configuration options. You can also test your regular expressions using a tool like RegExr to ensure they work as expected before implementing them.

    ![Image: Diagram showing client-side vs. server-side validation flow]

    It is imperative to remember that client-side validation is a UX enhancement, not a security measure. A malicious user can easily bypass any JavaScript-based checks. Therefore, server-side validation is absolutely essential and non-negotiable. Always re-validate all incoming data on your server before processing it or storing it in a database. This dual-layered approach ensures both a smooth user experience and a secure application. This is a core principle in our approach to Web Marketing and application development. For more information on web development best practices, you can review the MDN Web Docs.

    By mastering custom validation rules with jQuery, you can transform standard HTML forms into intelligent, interactive, and user-friendly data collection tools. This not only improves the quality of the data you receive but also significantly enhances the overall user experience on your site. If you’re looking to implement robust and secure forms on your website, our team at Lucid Site Designs has the expertise to build solutions that work. For a consultation on how we can improve your web applications, please Contact Us.

  • Local SEO AI Tools to Improve Your Area-Based Rankings

    Local SEO AI Tools to Improve Your Area-Based Rankings


    The New Frontier of Local Search: Why AI is No Longer Optional

    The digital landscape for local businesses has transformed dramatically from the days of simple yellow page directories to today’s intricate, intent-driven ecosystem. Consumers no longer just search for a business name; they ask complex questions, seek immediate solutions, and expect hyper-relevant results tailored to their exact location and needs. For a local enterprise, whether a boutique cafe in Miami’s Design District or a specialized dental clinic in Coral Gables, standing out in this crowded digital space is a monumental challenge. Google’s algorithm is in a constant state of flux, and the competition for visibility in the local map pack and organic search results is fiercer than ever. This relentless pace of change and the sheer volume of data involved in modern search engine optimization have pushed manual strategies to their absolute limit. Businesses find themselves struggling to keep up, often guessing at what works and reacting to ranking drops rather than proactively shaping their digital presence. This is precisely where the paradigm shifts. Artificial intelligence is no longer a futuristic concept discussed in tech circles; it has become the indispensable co-pilot for any serious local SEO strategy. AI provides the computational power to process immense datasets, identify subtle patterns in consumer behavior, automate time-consuming and repetitive tasks, and deliver predictive insights that were once impossible to obtain. It is the force multiplier that allows businesses to move from a reactive to a proactive stance, anticipating market trends and customer needs before they even fully form. According to a 2023 consumer survey from BrightLocal, a staggering 87% of consumers used Google to evaluate local businesses, a clear indicator that the digital storefront is now more critical than the physical one. In this environment, leveraging AI isn’t just about gaining a competitive edge; it’s about survival and relevance. It’s about ensuring that when a potential customer searches for a service you provide in your area, your business is the one that Google trusts and presents as the most authoritative and relevant answer.

    At Lucid Site Designs, we recognize that embracing this technological evolution is fundamental to our clients’ success. The core value of AI in local SEO lies in its ability to augment human expertise, not replace it. It handles the heavy lifting of data analysis and task automation, freeing up strategic minds to focus on what truly matters: understanding the unique character of a local market, crafting a compelling brand narrative, and building genuine customer relationships. An AI can analyze thousands of competitor reviews to identify common service complaints, but it takes a human strategist to turn that insight into an improved operational workflow and a marketing campaign that highlights superior service. An AI can generate a list of locally relevant keywords, but it requires an experienced SEO professional to weave those keywords into a content strategy that resonates with the local community’s values and culture. This synergy between machine intelligence and human ingenuity is the new frontier of digital marketing. By integrating sophisticated AI tools into a holistic strategy, we empower local businesses to not only compete but to dominate their specific geographic markets, transforming complex data into tangible, real-world growth and a stronger connection with the communities they serve. This approach ensures that technology serves the ultimate goal: driving more foot traffic, more phone calls, and more revenue.


    AI-Powered Tools for Hyperlocal Keyword Research and Content Strategy

    The foundation of any successful SEO campaign, especially at the local level, is a deep and nuanced understanding of what potential customers are searching for. Historically, this involved brainstorming seed keywords, using basic tools to find variations, and analyzing search volume. This approach, however, often misses the most critical element: searcher intent. A person searching “pizza Miami” has a different need than someone searching “best deep-dish pizza delivery Brickell.” The latter is a high-intent, commercially valuable query that traditional methods might overlook. Artificial intelligence completely revolutionizes this process by shifting the focus from keywords as simple strings of text to keywords as representations of complex human needs. AI-driven platforms are capable of analyzing not just search volume but the entire search engine results page (SERP) landscape, including the types of content that rank, the questions people also ask, and the semantic relationships between different topics. This allows for the discovery of hyperlocal search intent with a precision that was previously unattainable.


    Uncovering Hyperlocal Search Intent


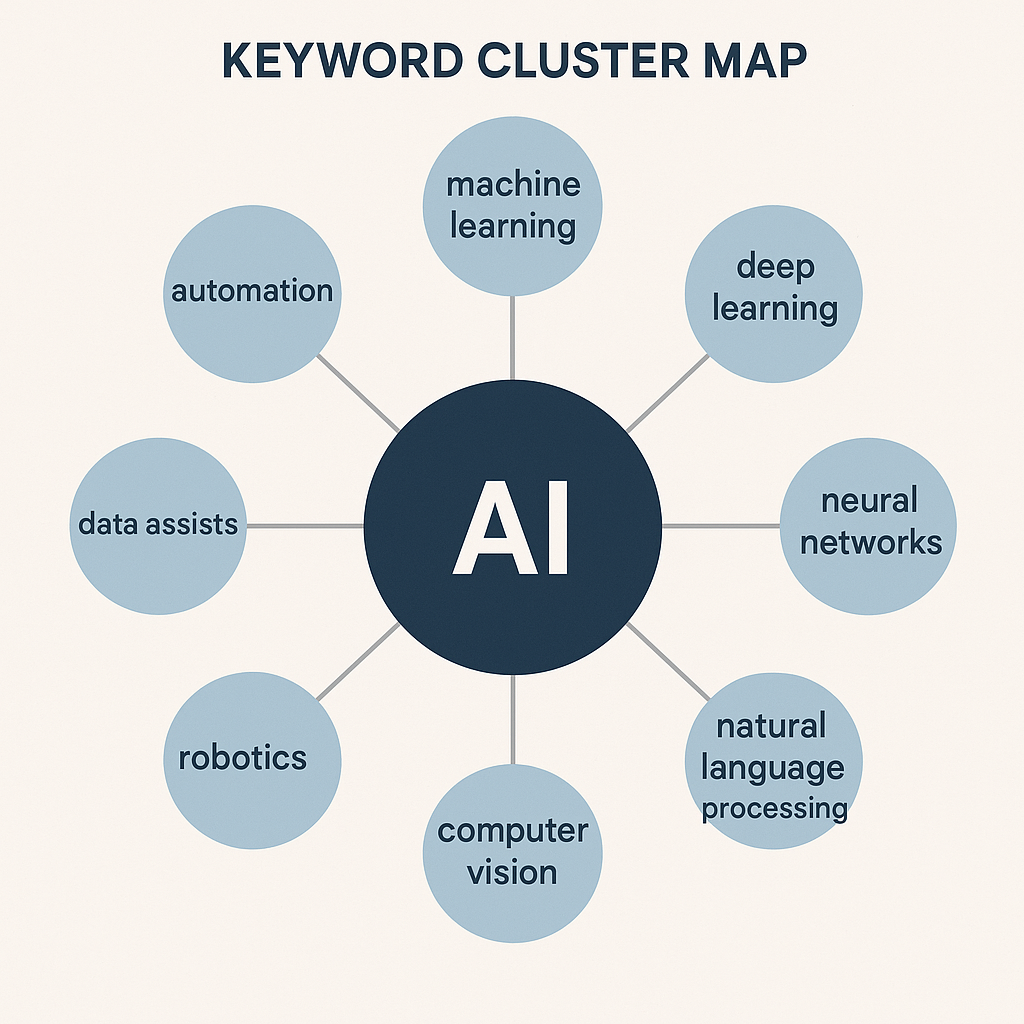
    AI-powered tools like Semrush and Surfer SEO have moved far beyond simple keyword suggestion. They employ sophisticated machine learning models to deconstruct the top-ranking content for any given local search query. Instead of just giving you a list of keywords, they provide comprehensive topic clusters and identify latent semantic indexing (LSI) keywords that Google’s algorithm associates with a particular topic in a specific geographic context. For instance, for a local roofer in an area prone to hurricanes, an AI tool would not only suggest “roof repair Miami” but also related terms like “hurricane-proof roofing,” “tile roof leak repair South Florida,” and “post-storm roof inspection.” It understands the contextual nuances of the location and connects them to the core service. This allows businesses to create content that comprehensively answers the user’s primary question as well as all their follow-up questions, establishing deep topical authority. The true power of this approach is its ability to uncover long-tail keywords that are low in competition but exceptionally high in conversion potential. An AI can generate hundreds of variations like “emergency AC repair near me on a weekend” or “affordable family photographer in Coconut Grove,” queries that signal urgent need and a readiness to purchase. By targeting these highly specific phrases, a local business can attract the most qualified leads and bypass the intense competition for broader, more generic terms.

    AI-driven keyword cluster map showing central topic and related local subtopics


    Generating Geographically-Relevant Content at Scale


    One of the most significant challenges for businesses serving multiple locations or a wide service area is creating unique, high-quality content for each specific neighborhood or city. Producing generic content and simply swapping out the city name is an outdated practice that search engines can easily detect, and it offers little value to the reader. This is where AI content generation tools, such as Jasper or Copy.ai, can serve as powerful assistants. It is crucial, however, to approach these tools with the right mindset. They are not a magic button for creating finished, perfect content; rather, they are incredibly efficient drafting tools. An effective workflow involves using AI as a starting point. For example, a plumbing company serving all of Miami-Dade County could use an AI to generate a unique first draft for a landing page for each key suburb like Aventura, Doral, and Key Biscayne. The prompt given to the AI would include specific details about common plumbing issues in that area, local landmarks, and the company’s unique selling propositions. The AI can then produce a structured, well-written draft in minutes. The next, and most critical, step is for a human expert to take over. This is where the team at Lucid Site Designs adds immense value. We refine the AI-generated draft, fact-check all information, inject the brand’s unique voice and personality, and add authentic local flavor that a machine could never replicate. This hybrid approach allows for the creation of geographically-relevant content at a scale and speed that would be impossible manually, ensuring that every potential customer feels that the content is speaking directly to them and their community. This process is a vital component of a larger Web Marketing strategy, ensuring that every digital touchpoint is both efficient and effective.


    Automating and Optimizing Your Google Business Profile with AI

    Your Google Business Profile (GBP) is, without a doubt, the single most important asset in your local SEO arsenal. It’s your digital storefront, your virtual billboard, and often the very first interaction a potential customer has with your brand. A well-optimized and active GBP can dramatically increase your visibility in the coveted Google Map Pack, drive phone calls, and provide directions directly to your door. However, managing it effectively requires consistent effort: posting regular updates, responding to every review, and answering customer questions promptly. For a busy business owner, these tasks can easily fall by the wayside. Artificial intelligence offers a powerful solution by automating many of the most time-consuming aspects of GBP management, allowing you to maintain a dynamic and engaging profile with a fraction of the manual effort. This ensures your profile remains fresh and relevant in the eyes of both Google’s algorithm and your potential customers.


    AI for GBP Post and Q&A Management


    Consistency is key when it comes to Google Business Profile. Google’s algorithm tends to favor profiles that are actively managed, signaling that the business is open and engaged with its community. AI-powered platforms such as Surge Social or Local Viking can streamline this process significantly. These tools can use AI to help generate and schedule a steady stream of GBP posts. You can set parameters based on promotions, events, or blog updates, and the AI can create compelling copy and even suggest relevant imagery, ensuring your profile never looks stale. This consistent activity can directly impact your local rankings and customer engagement rates. Furthermore, the Q&A section of your GBP is a goldmine of customer insight and an opportunity to proactively address common concerns. AI can analyze the Q&A sections of your top local competitors to identify frequently asked questions within your industry and region. It can then help you build out a comprehensive list of questions and expertly crafted answers for your own profile. By proactively providing this information, you not only help potential customers but also demonstrate your expertise and authority, building trust before they even contact you. AI can also assist in monitoring new questions as they come in, ensuring you can provide a timely and accurate response, which is another positive signal to Google.


    Mastering Local Reviews with AI-Assisted Responses


    Online reviews are the lifeblood of a local business, serving as powerful social proof that directly influences purchasing decisions. Responding to every review—both positive and negative—is not just good customer service; it’s a critical local ranking factor. However, crafting unique, thoughtful responses to dozens or even hundreds of reviews can be an exhausting task. This is where AI-assisted response generation comes into play. Platforms like BrightLocal and Podium are integrating AI features that can analyze the content and sentiment of a customer review and generate a relevant, well-structured draft response. For a positive review, the AI might draft a response that thanks the customer by name, mentions the specific service they enjoyed, and invites them back. For a negative review, it can generate a professional and empathetic response that acknowledges the customer’s concerns, apologizes for their experience, and provides a clear path to resolution. The key here is that these are drafts. The most effective strategy involves using the AI-generated text as a starting point and then having a human quickly personalize it. This “human-in-the-loop” approach saves an enormous amount of time while ensuring that every response is authentic and on-brand. According to a 2023 report from ReviewTrackers, businesses that actively respond to their online reviews can earn up to 49% more revenue than those that don’t, highlighting the immense financial impact of a well-managed review strategy powered by the efficiency of AI.


    Advanced Local SEO Tactics Fueled by Artificial Intelligence

    Beyond the foundational elements of keyword research and Google Business Profile management, artificial intelligence is unlocking new, more sophisticated tactics that can provide a significant competitive advantage in the local search arena. These advanced applications involve using AI to analyze complex data sets and automate high-level strategic tasks that are either too complex or too time-consuming for humans to perform effectively. From discovering hidden link-building opportunities to predicting ranking fluctuations before they happen, AI is empowering SEO professionals to operate with a level of precision and foresight that was previously unimaginable. This is where a partnership with a tech-forward agency like Lucid Site Designs becomes invaluable, as we leverage these cutting-edge tools to build more resilient and proactive local SEO campaigns.


    AI-Driven Local Link Building and Citation Management


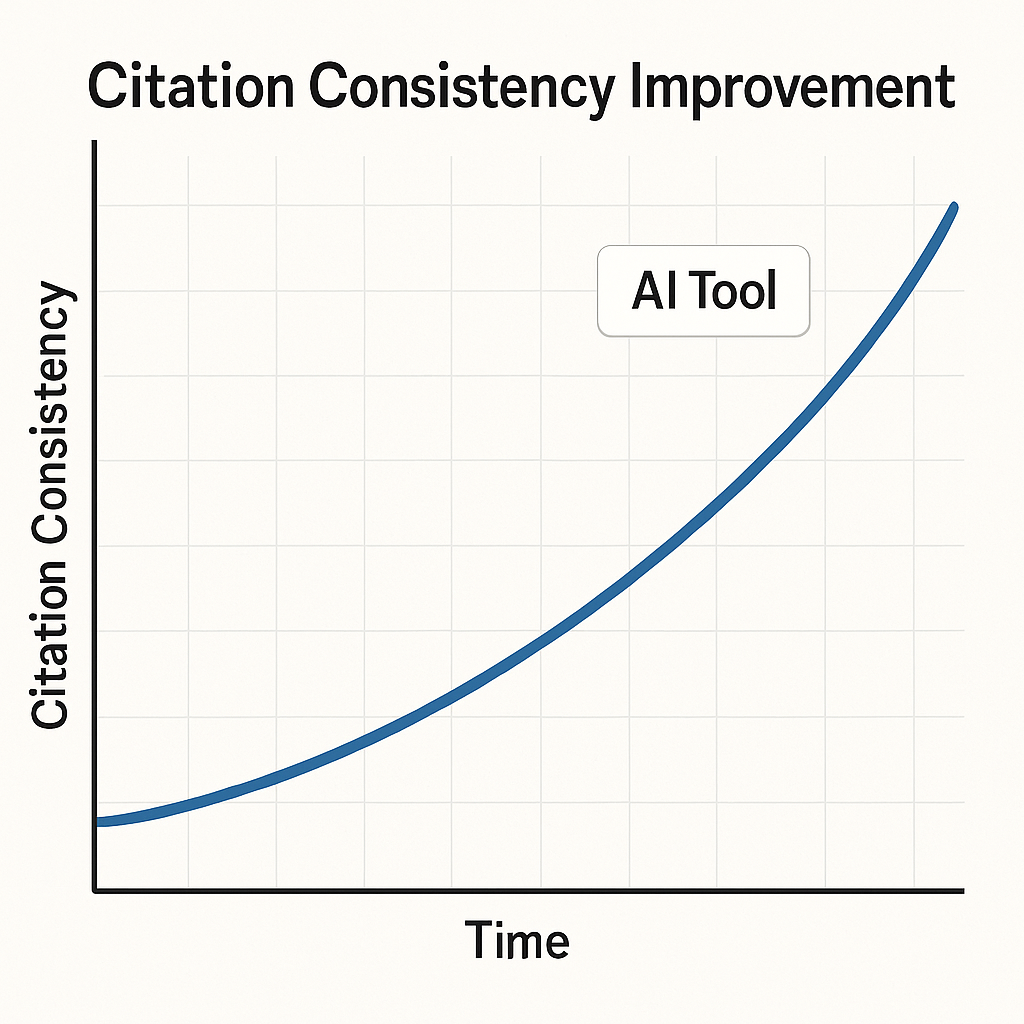
    Backlinks and citations remain critical ranking signals for local businesses. A backlink from a well-respected local blog, news outlet, or community organization sends a powerful signal of trust and relevance to Google. Similarly, consistent citations (your business name, address, and phone number, or NAP) across a wide range of online directories build authority and confirm your location. The manual process of finding these opportunities and ensuring citation consistency is painstaking. AI radically streamlines this. AI-powered tools can perform a deep analysis of the backlink profiles of all the top-ranking local competitors. They can identify the exact local blogs, event sponsorship pages, and community sites that are linking to your competitors and flag them as high-priority targets for your own outreach efforts. Furthermore, AI can scrape the web for unlinked brand mentions or hyperlocal content that would be a perfect fit for a backlink, uncovering opportunities that a human would likely miss. When it comes to citations, consistency is paramount. A simple typo in your street name on one directory can create confusion for search engines and harm your rankings. AI-driven platforms like Yext or Moz Local use advanced technology to scan hundreds of directories simultaneously, identifying any inconsistencies in your NAP data. They can then automate the correction process, ensuring your business information is accurate everywhere it appears online. For a deeper dive into effective strategies, Moz offers an excellent guide on local link building. This level of automation and precision is simply not achievable through manual effort.

    A graph showing citation consistency improvement over time using an AI tool
    Feature Traditional Rank Tracking AI-Powered Predictive Rank Tracking
    Data Focus Historical keyword positions (e.g., “was #3, now #5”) Future position forecasts based on multiple variables
    Analysis Reactive; identifies drops after they occur Proactive; flags potential drops before they happen
    Insights Basic up/down movement and competitor positions Correlates ranking changes with SERP feature updates, competitor content velocity, and seasonality
    Strategy Adjust strategy based on past performance Adjust strategy based on predicted outcomes and opportunities
    Value Good for reporting on what happened Essential for shaping what will happen


    Predictive Analytics for Local Rank Tracking


    Traditional rank tracking tells you where you stood yesterday. AI-powered predictive analytics, on the other hand, tells you where you are likely to stand tomorrow. This is a game-changing shift from a reactive to a proactive SEO posture. Advanced platforms like STAT or Nozzle don’t just record your daily ranking for a list of keywords. They ingest a massive amount of data, including your historical ranking data, all your competitors’ movements, changes in Google’s SERP features (like the appearance of new image packs or “People Also Ask” boxes), and even external factors like local seasonality or major events. A sophisticated machine learning model then analyzes all these variables to identify patterns and correlations that precede ranking changes. For example, the AI might detect that whenever a specific competitor publishes a new blog post of a certain length and gains two specific types of backlinks, their ranking for a key term tends to jump three positions within ten days. Armed with this predictive insight, you can preemptively strengthen your own page for that term, mitigating the potential drop or even capitalizing on the opportunity. This allows for a much more agile and intelligent allocation of resources, focusing your efforts on the areas that are predicted to have the greatest impact on your future visibility.


    Choosing the Right AI Tools and Integrating Them into Your Strategy

    The market for SEO software is now flooded with tools that claim to use artificial intelligence, and it can be daunting for a business owner to determine which ones are genuinely effective and which are simply capitalizing on buzzwords. Selecting the right tools and, more importantly, integrating them into a cohesive strategy is crucial for achieving a positive return on investment. A powerful tool is useless without a clear plan for how its capabilities will be used to achieve specific business goals. The most successful approach involves a careful evaluation process followed by the seamless integration of technology into a workflow that is still guided by human expertise and strategic oversight.


    A Framework for Evaluating Local SEO AI Tools


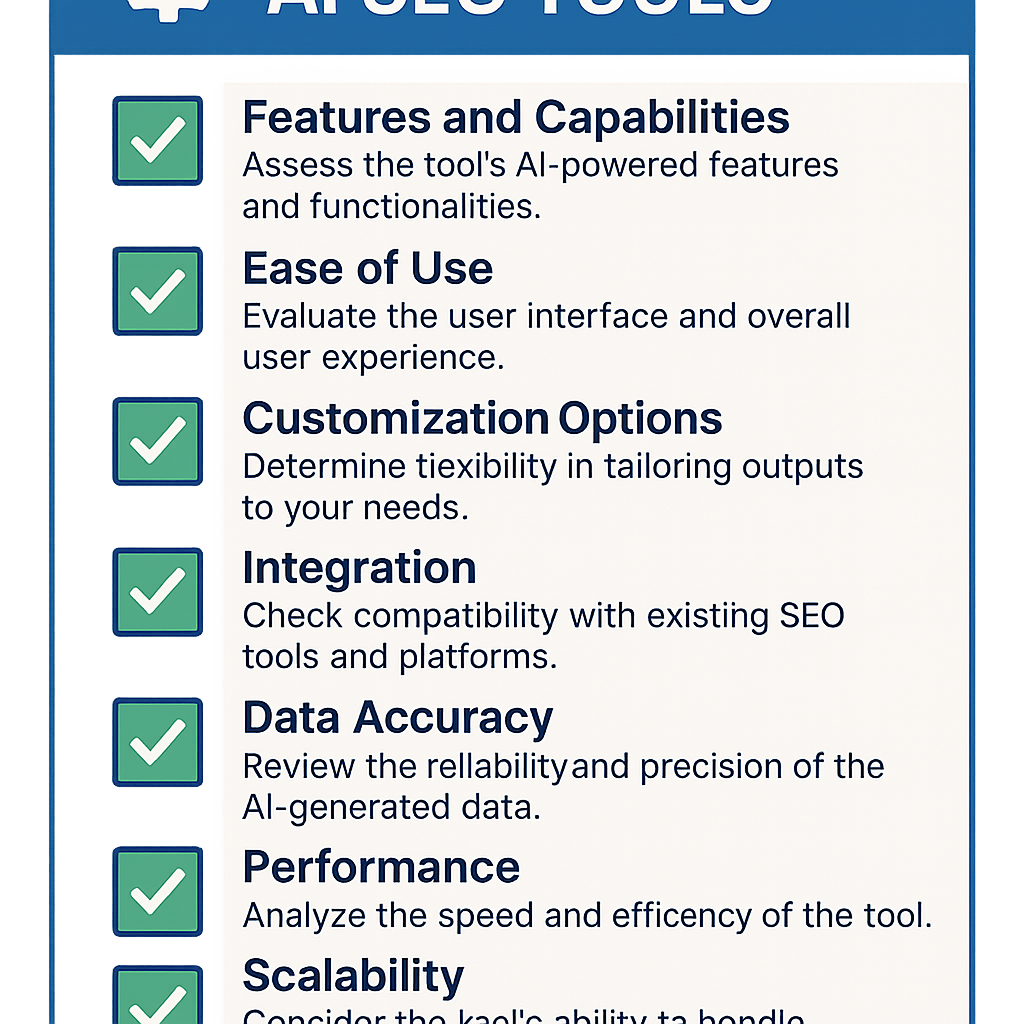
    Before investing in any AI-powered platform, it’s essential to evaluate it against a set of core criteria to ensure it aligns with your business needs. First, consider data accuracy and sources: where does the AI get its information? For local SEO, data should be pulled from reliable sources and be geographically precise. Second, evaluate integration capabilities: does the tool connect smoothly with your existing marketing stack, such as Google Analytics, Google Search Console, and your Google Business Profile? Seamless integration prevents data silos and provides a more holistic view of your performance. Third, assess usability and workflow: is the interface intuitive, or does it require a steep learning curve? The best tools are designed to simplify complex processes, not complicate them. Fourth, think about scalability: can the tool support your business as it grows, whether that means adding new locations or expanding your service offerings? Finally, look into the available support and training. A good software provider will offer robust customer support, tutorials, and resources to help you get the most out of their platform.

    A checklist infographic for evaluating AI SEO tools
    AI-Powered Task Human Expert’s Role
    Generates a first draft of a location-specific landing page. Refines copy, injects brand voice, adds local nuance, and fact-checks information.
    Identifies a list of semantically related hyperlocal keywords. Selects the highest-intent keywords and builds a content strategy around them.
    Drafts responses to online customer reviews. Personalizes and approves each response to ensure authenticity and empathy.
    Discovers a potential local backlink opportunity. Conducts personalized outreach and builds a genuine relationship with the site owner.
    Provides predictive data on potential ranking drops. Interprets the data and formulates a proactive strategy to mitigate the risk.


    The Human Element: Why AI is a Co-pilot, Not the Pilot


    It is essential to re-emphasize the most critical point in this entire discussion: AI is a co-pilot, not the pilot. Artificial intelligence excels at processing data, identifying patterns, and automating tasks at a scale humans cannot match. However, it lacks genuine creativity, strategic intuition, and a true understanding of local market culture and nuance. This is where the partnership with an expert agency like Lucid Site Designs creates an unbeatable combination. We use AI to gather the intelligence and create efficiencies, but our human experts interpret that intelligence to build the overarching strategy. An AI can tell you what topics are trending in your area, but a human strategist can tell you why and how to create content that authentically connects with that trend. While AI can significantly enhance paid advertising campaigns, it is the strategic oversight from a dedicated team providing Google Adwords Marketing Services that ensures your budget is spent effectively to capture high-intent local customers. For businesses located in our home region, partnering with a specialized Miami SEO Company provides the ultimate advantage, combining cutting-edge technology with an indispensable, on-the-ground understanding of the South Florida market.

    The future of local SEO is not a battle of humans versus machines. It is a collaborative dance where technology provides the power and data, and human experts provide the wisdom, strategy, and creative spark. By embracing this synergy, your local business can move beyond simply competing online and begin to truly dominate your digital neighborhood. If you’re ready to explore how a tailored, AI-enhanced local SEO strategy can transform your business, we invite you to connect with our team of experts. Let’s build a plan that leverages the best of technology and human ingenuity to drive measurable, lasting results for your brand.

    Word Count: 2362